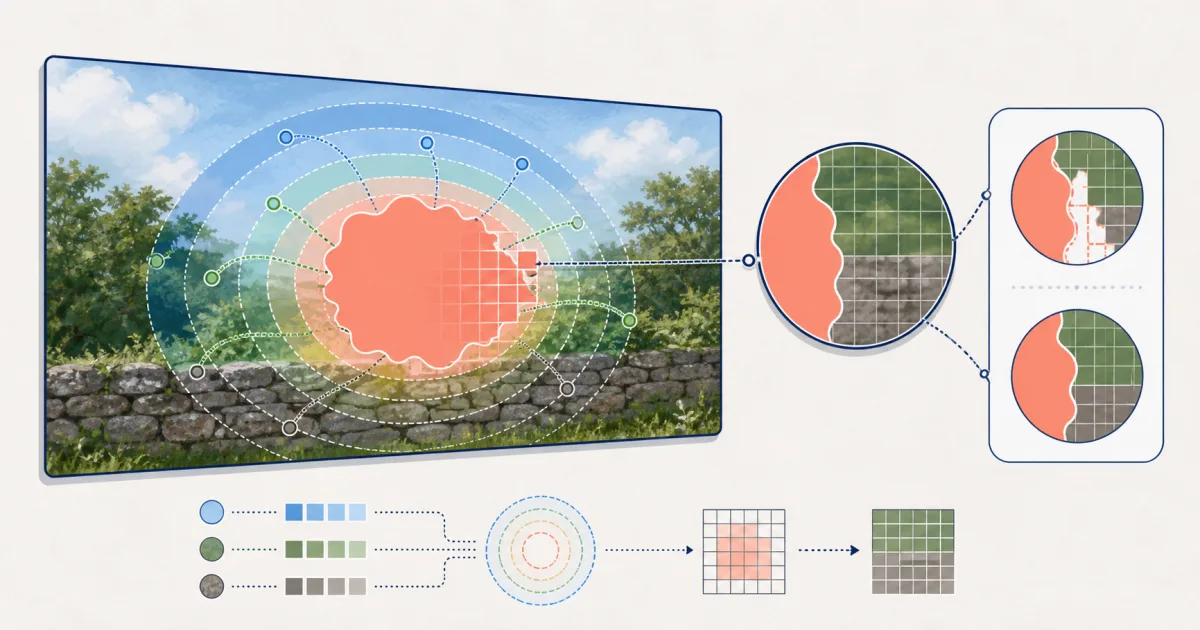
An image eraser does not know what was truly behind an object. It predicts replacement pixels from the visible image and the area you mark.
That marked area is the mask. The quality of the mask often matters as much as the model.
The Three Inputs to Inpainting
An inpainting model receives:
- The source image.
- A mask that marks pixels to replace.
- The visible context around the mask.
The output is a new image where the masked region contains generated pixels. The unmasked region should remain unchanged.
The FindUtils Image Eraser lets you draw the mask with a brush, rectangle, or lasso. It then runs an ONNX inpainting model in the browser and lets you download a PNG.
Why Mask Edges Matter
If the mask leaves a thin part of the object, the model can treat that fragment as context. The result can preserve a colored outline, a shadow, or part of a letter.
Cover the object and a small border around it. Include shadows that belong to the object. Do not cover important neighboring detail unless the model must replace it.
The best mask is not always the tightest mask. It is the smallest mask that removes all visual evidence of the unwanted object.
What the Model Can Infer
Inpainting works well when the missing region has predictable surroundings:
- Sky.
- Grass.
- Sand.
- Water.
- Walls.
- Repeating textures.
- Simple gradients.
It becomes harder when the object covers unique information:
- A face.
- Text that must remain readable.
- A hand or detailed anatomy.
- A complex geometric edge.
- A product label.
- A large part of the main subject.
The model can generate a plausible fill. It cannot recover hidden facts.
Fast and Quality Models
The Image Eraser offers two local model choices.
The fast option uses MI-GAN and has a smaller download. It suits quick cleanup and devices with limited resources.
The quality option uses LaMa and has a larger download. LaMa uses Fourier convolutions to increase the network's effective receptive field. Its published research focuses on large masks, periodic structures, and resolution robustness.
A larger model does not guarantee a perfect edit. Mask quality and image structure still control the task.
Why the First Use Takes Longer
The browser must download the selected model before it can run inference. Later uses can reuse the cached model data, depending on browser storage and cache state.
The photo itself stays in the browser workflow. The model file arrives from its published source, then local ONNX inference processes the image and mask.
This design avoids sending the user's photo to a remote editing service. It also means performance depends on the device, browser, selected model, and image size.
A Better Erasing Workflow
Start with the Final Crop
Crop first. Do not spend time removing an object that will sit outside the final frame.
Use a Moderate Brush
A very small brush creates uneven edges. A very large brush removes useful context. Use a size that covers the object cleanly.
Remove Large Objects in Stages
Erase one logical section, inspect the result, then continue. A staged edit gives the model more useful context for the next pass.
Change Models When the Failure Type Changes
Use the fast model for simple backgrounds and quick attempts. Try the quality model when structure, texture, or a larger mask needs more context.
Inspect at Full Size
Small previews hide repeated texture, warped edges, and color seams. Zoom in before downloading.
Failure Patterns and Fixes
Colored Halo
The mask did not cover the object's edge or shadow. Expand the mask slightly and try again.
Smear or Repeated Patch
The surrounding texture is difficult or the mask is too large. Work in smaller stages or use the quality model.
Bent Straight Line
The object crossed architecture, furniture, or another geometric edge. Draw a mask that gives the model clear line context on both sides. Complex reconstruction may still need a full photo editor.
Changed Nearby Detail
The mask covered too much. Undo and tighten the boundary around the unwanted region.
What “AI Eraser” Should Not Promise
An eraser can make a region visually plausible. It cannot prove what existed behind the removed object. Do not use generated pixels as documentary evidence.
Only remove a watermark when you own the image or have permission. A technical ability does not remove copyright obligations.
Try It
Open the Image Eraser with a photo that has a small object on a simple background. Compare the fast and quality models with the same mask.
Read the Image Eraser Guide for the complete editing workflow.